
Creating an image outline in Canva is a simple yet powerful way to enhance your designs, whether you’re working on a presentation, social media post, or any other graphic project.
However, you have to keep in mind that it is a complex tool that will require certain skills and experience. Completing a design cannot be done without preparing a proper image outline.
What is the Main Purpose of it?
Before learning more about the technical aspects, it’s crucial to understand what image outlines are and why they matter.
- Definition and Importance: An image outline, also known as a stroke, is a border that surrounds an image or an element in your design. It helps to define the boundaries of the image and can be used to make it stand out or to create a cohesive look in your design. Outlines can be subtle or bold, depending on your design needs.
- When to Use Image Outlines: Image outlines are versatile and can be used in various design scenarios. They are particularly useful when you want to highlight a specific element, create a sense of depth, or add a decorative touch to your design. Understanding when and how to use image outlines will elevate your design skills to the next level.
What Are the First Steps?
Canva is a user-friendly graphic design tool that offers a wide range of features, including the ability to add outlines to images.
- Create an Account and Explore the Interface: If you’re new to Canva, you’ll need to create an account to get started. Once you’re logged in, take some time to familiarize yourself with the interface. You’ll find a variety of templates and design elements at your disposal.
- Choose the Right Template: For this guide, you can start with a blank canvas or choose a template that suits your design needs. Canva offers templates for social media posts, presentations, posters, and more. Selecting the right template will give you a head start on your design.
How to Add Images?
With your canvas ready, the next step is to add images to your design.
- Upload and Select Images: You can upload images from your computer or choose from Canva’s extensive library of stock photos. To upload an image, click on the ‘Uploads’ tab on the left sidebar, then click ‘Upload an image or video’. Select the image you want to use and click ‘Open’.
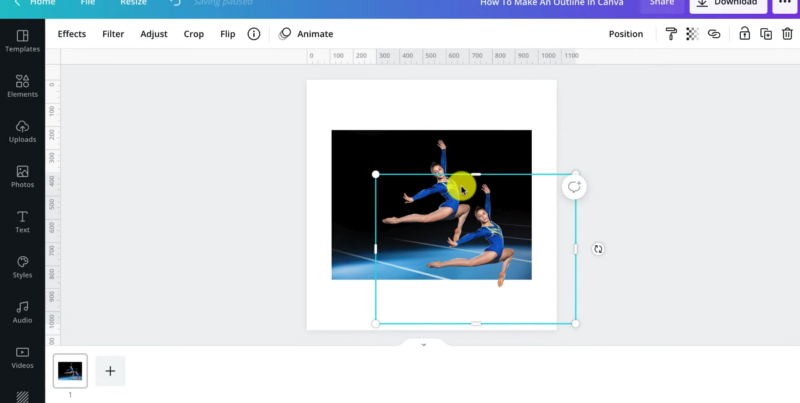
- Adjust and Position Images: Once your image is on the canvas, you can adjust its size and position it according to your design needs. Click and drag the corners of the image to resize it, and click and drag the image to reposition it.
Create an Image Outline
Now that your image is in place, let’s add an outline.
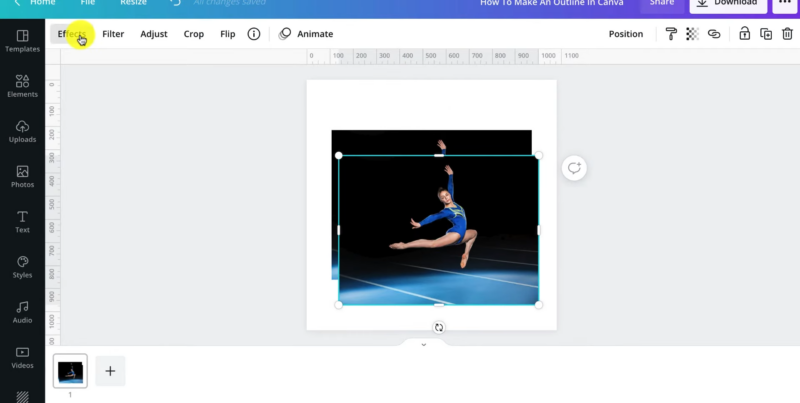
- Select the Image: Click on the image to select it. You’ll see a toolbar appear at the top of the screen with various editing options.
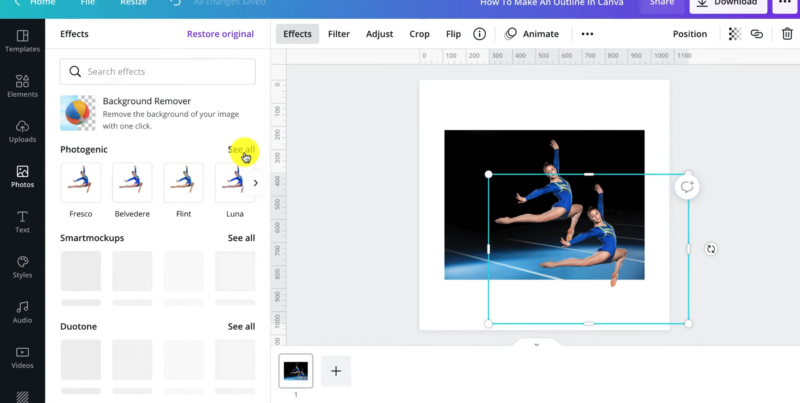
- Add the Outline: To add an outline, click on the ‘Effects’ button on the toolbar. Scroll down and find the ‘Outline’ effect. Click on it to apply the outline to your image. You can adjust the color, thickness, and transparency of the outline using the sliders that appear.
Customize the Image Outline
Canva provides various options to customize your image outline to suit your design.
- Adjust Thickness and Transparency: Use the sliders to adjust the thickness and transparency of the outline. A thicker outline will make a bolder statement, while a thinner outline will be more subtle. Adjusting the transparency can create a softer look.
- Choose the Right Color: Click on the color box to choose a color for your outline. You can select a color from the palette, enter a color code, or use the dropper tool to pick a color from your design. Choosing the right color is crucial as it can either complement or contrast with your image.
Advanced Techniques
Once you’re comfortable with the basics, you can explore advanced techniques to take your design to the next level.
- Create a Double Outline: For a unique effect, try adding a double outline to your image. Add the first outline as described above, then duplicate the image and add a second outline with a different color and thickness. Position the duplicated image slightly offset from the original to create the double outline effect.
- Use Outlines Creatively: Don’t be afraid to get creative with your outlines. Use them to create patterns, frame text, or add decorative elements to your design. Experimenting with different styles and effects will unlock endless possibilities.
Finalize and Export Your Design
With your image outline complete, you’re ready to finalize and export your design.
- Review and Make Final Adjustments: Take a moment to review your design and make any final adjustments. Ensure that everything is aligned and balanced, and that the colors and fonts are consistent throughout.
- Export Your Design: Once you’re satisfied with your design, click on the ‘Share’ button in the top right corner of the screen. Select ‘Download’ and choose the file format you want to export your design in. Click ‘Download’ to save your design to your computer.
How to Improve Your Skills?
Canva offers a plethora of tools and features that can help you create professional-looking designs with ease.
Explore Other Effects and Features
Canva is not just about image outlines; it has a wide array of effects and features that can transform your design. For example, there is a very useful feature where you can remove the background.
- Use Shadows and Reflections: Add depth to your images and text by using shadows and reflections. These effects can be found under the ‘Effects’ tab, similar to the outline effect. They add a 3D feel to your design, making it more dynamic and engaging.
- Experiment with Filters: Filters are a great way to change the mood and feel of your images. Canva offers a variety of filters that you can apply with just one click. You can also adjust the intensity of the filter to suit your design.
Learn More About Text and Typography
Text is a crucial element in any design, and Canva provides extensive options to ensure your text stands out.
- Choose the Right Font: Canva has a vast library of fonts to choose from. Select a font that complements your design and is easy to read. Remember, the font you choose can significantly impact the overall feel of your design.
- Play with Text Effects: Just like images, you can add effects to your text. Add a drop shadow, change the letter spacing, or create a curved text effect. These small details can make a big difference in your design.
Work With Others and Share Your Work

One of the great features of Canva is the ability to collaborate with others and share your work easily.
Work with Teams
If you are working on a group project or need feedback on your design, Canva makes it easy to collaborate.
- Invite Team Members: You can invite others to view or edit your design by clicking on the ‘Share’ button and entering their email addresses. This is a great way to get feedback and make collaborative edits in real-time.
- Leave Comments: Team members can leave comments directly on the design, making it easy to communicate and make changes quickly.
Share Your Design
Once your design is complete, sharing it with the world is just a few clicks away.
- Download and Publish: You can download your design to your computer or publish it directly to social media from Canva. Choose the option that best suits your needs.
- Use Canva’s Presentation Mode: If you have created a presentation, you can use Canva’s presentation mode to show it off. This feature turns your design into a slideshow, making it perfect for meetings or events.
FAQs
How do you outline a logo?
To outline a logo, especially if it’s a text-based logo, you can use design software like Adobe Illustrator or Canva. In Illustrator, you can select the text or logo and choose the ‘Stroke’ option to add an outline. In Canva, after uploading your logo, click on ‘Effects’ and then ‘Outline’ to add an outline. Adjust the thickness and color as needed.
How do I outline a PNG image?
To outline a PNG image, you can use photo editing software like Photoshop or online tools like Canva. In Photoshop, load your image, select the ‘Layer’ panel, right-click on your image layer, select ‘Blending Options’, and then ‘Stroke’. In Canva, upload your PNG image, click on it, and select ‘Effects’ > ‘Outline’.
How do I make a white outline of a picture?
To make a white outline of a picture, use a photo editing tool and select the outline or stroke option. Set the color to white and adjust the thickness to your preference. In Canva, after uploading your image, click on ‘Effects’, select ‘Outline’, choose white as the color, and adjust the thickness.
Should I outline my logo?
Outlining a logo can enhance its visibility, especially on complex backgrounds, and can help in creating a consistent look across various mediums. However, it’s essential to ensure that the outline complements the logo and doesn’t make it appear cluttered. Consider the logo’s usage and the brand’s aesthetic before deciding.
What makes a logo more attractive?
A logo becomes more attractive when it is simple, memorable, versatile, relevant, and timeless. It should convey the brand’s message effectively and be easily recognizable. Using appropriate colors, fonts, and imagery while keeping the design balanced and scalable also contributes to a logo’s attractiveness.
Should a logo be JPEG?
A logo can be in JPEG format for web use, but it’s not the best format for all purposes. JPEGs can lose quality when compressed and don’t support transparent backgrounds. For logos, vector formats like SVG or AI are preferable as they are scalable without losing quality. PNG is also a good option for web use due to its support for transparency.
Summary
Canva offers a Design School with tutorials, courses, and resources to help you learn new skills and techniques. Take advantage of these free resources to enhance your knowledge. Like any skill, design improves with practice.
Keep experimenting with Canva, trying out new features, and challenging yourself with different types of projects. In the end, don’t be afraid to share your work and ask for feedback. Learning from others is one of the best ways to improve your skills and gain new perspectives.